Mo's Checker Pages
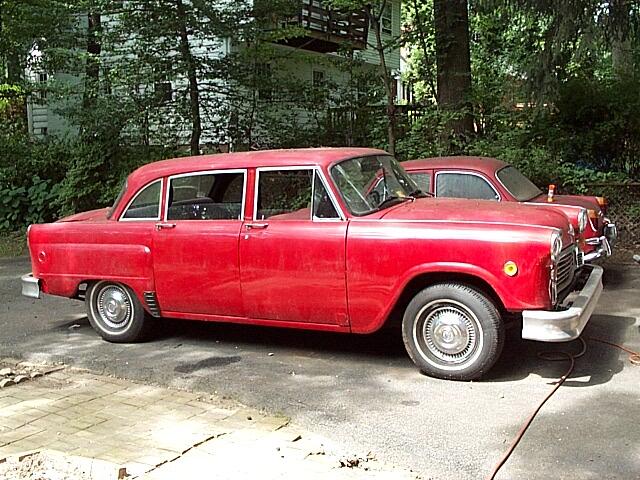
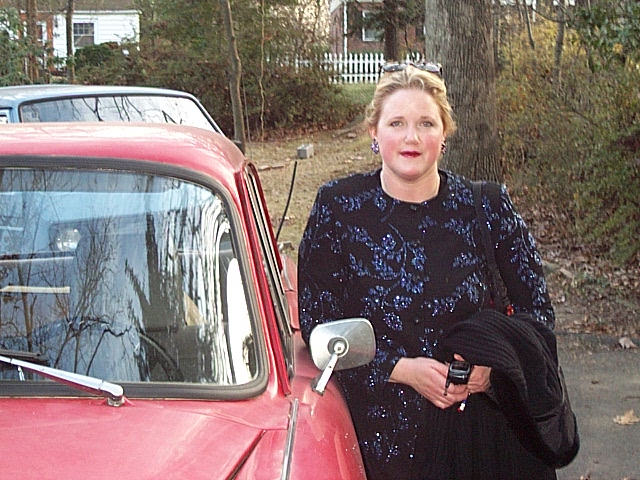 Welcome to Mo's Checker Pages - a simple little site dedicated to my best friend and her huge red car.
This Site! This website is brand new as of January 2002. Maureen and I purchased the Checker back in August of 2000, and we have been slowly fixing it up to make it streetworthy. Now that the car is nearly on the road, I thought it was time to share it with the rest of the world.
If you have a technical question about the car or the repairs, feel free to e-mail me.
and some pictures
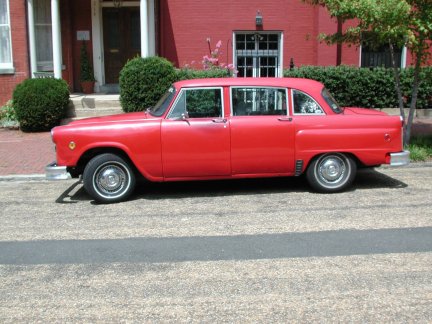
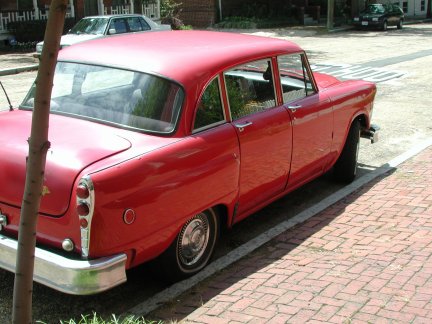
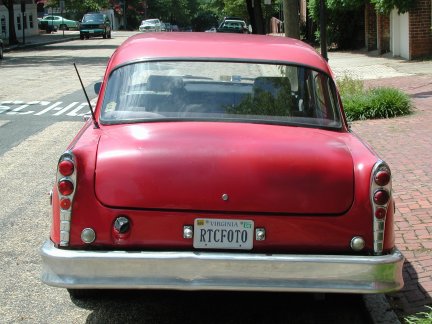
We saw the ad for a 1981 Checker for sale on the www.checkercabs.org website in late July of 2000. Since the car was located in Richmond, VA, we had the owner send some digital pictures for us to look over. A few weeks later the owner drove it up to Silver Spring, MD for us to look at. The deal was struck that day, and we took delivery a few more weeks after that.
Click on the links on the left to see the original pictures!
Driver's Side
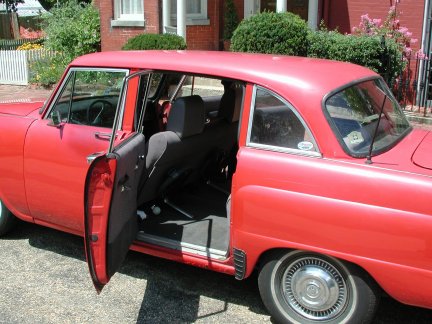
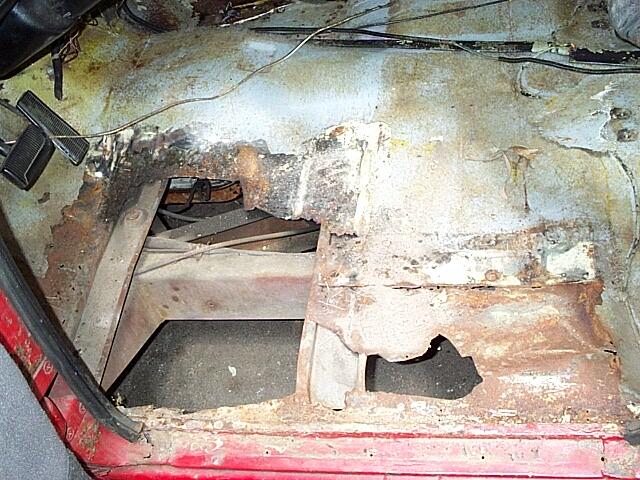
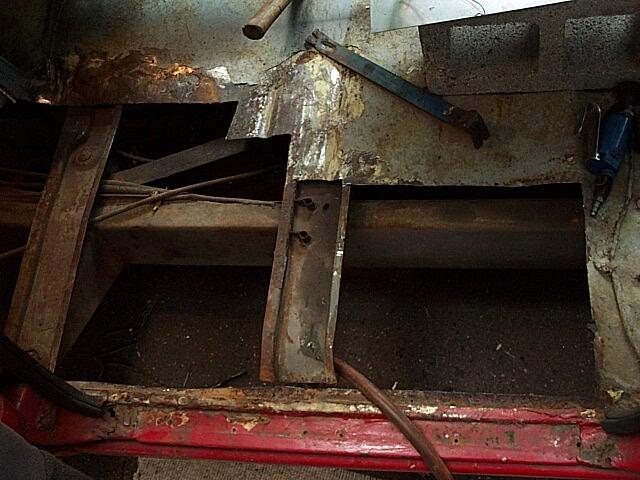
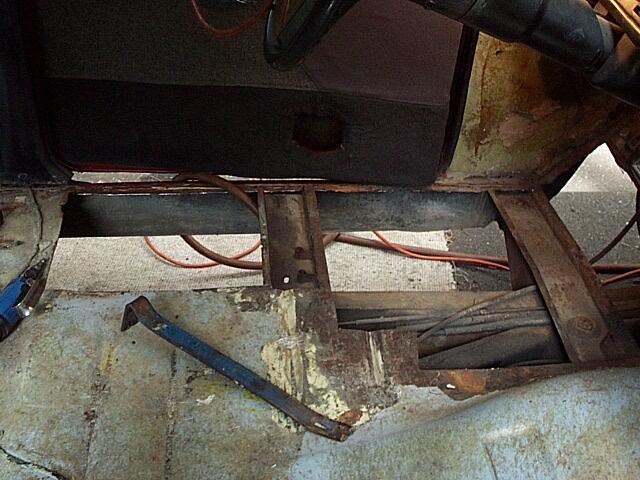
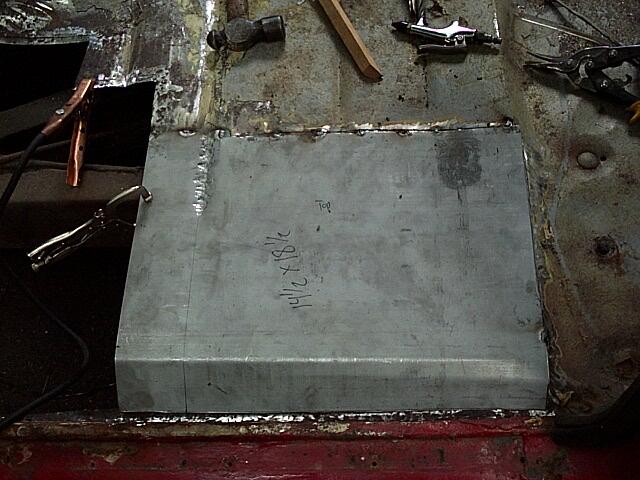
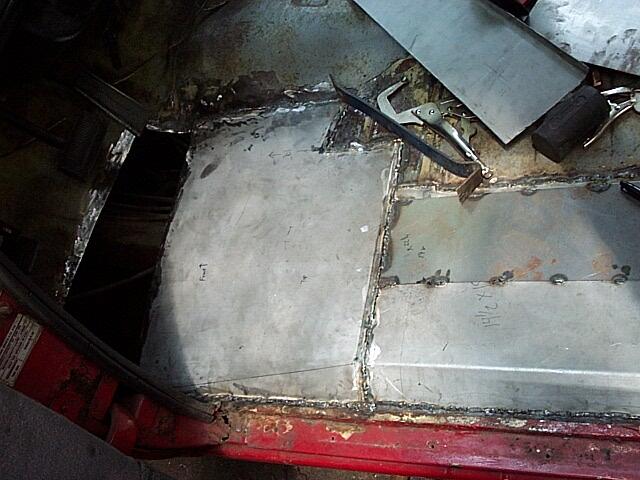
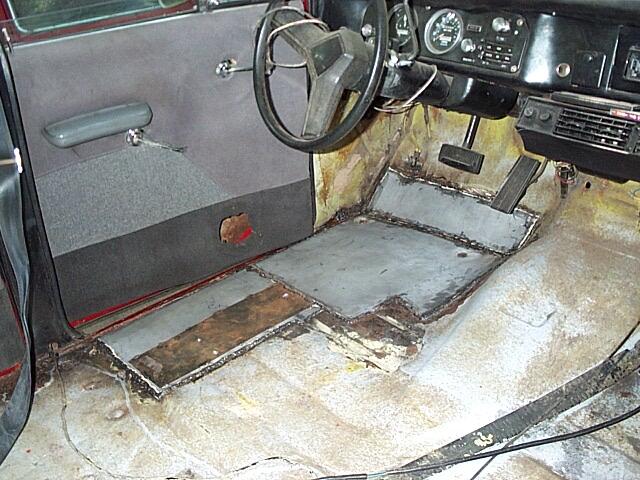
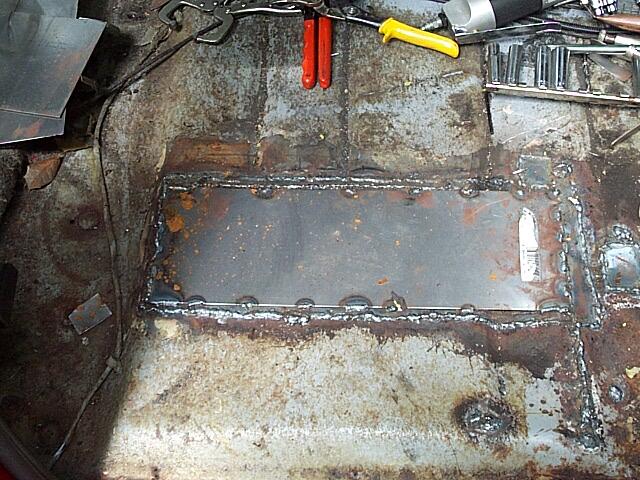
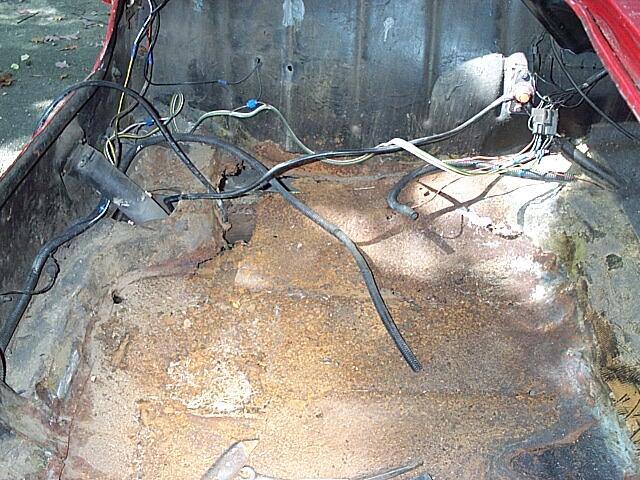
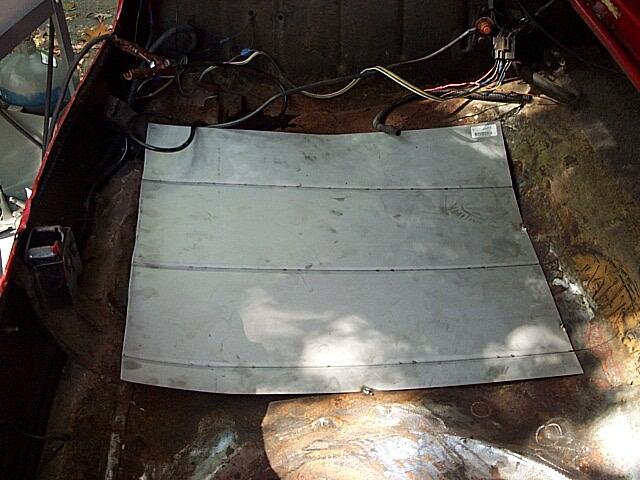
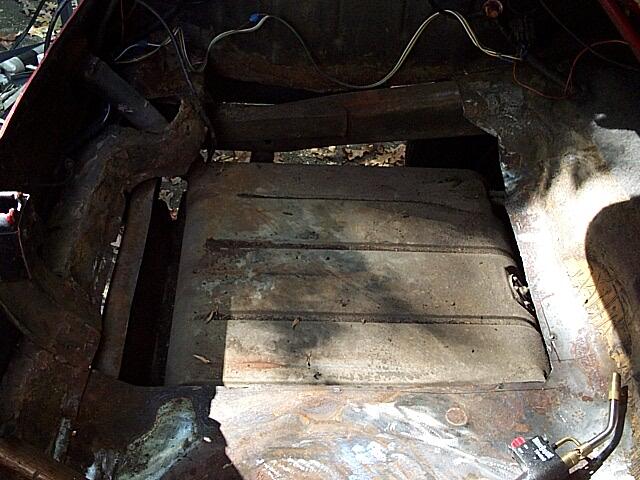
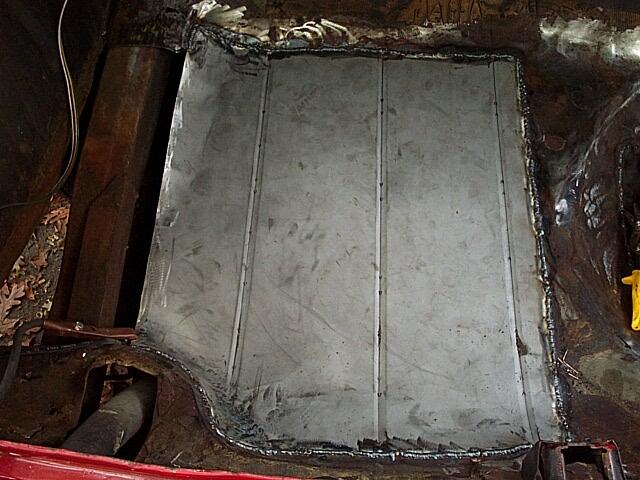
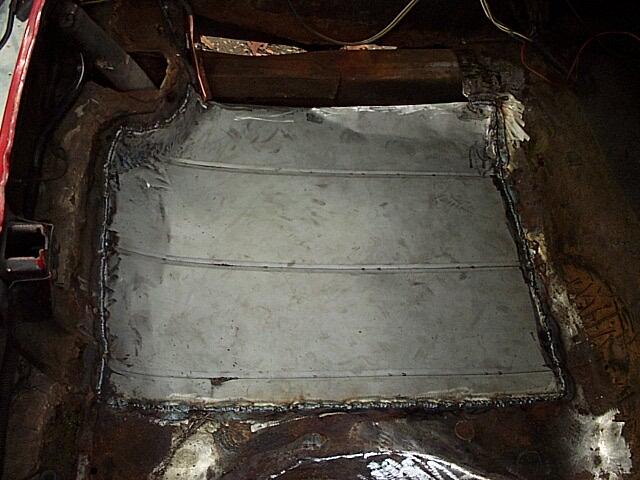
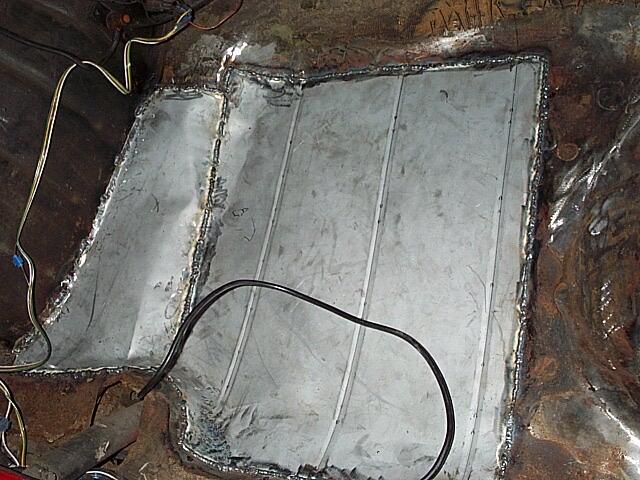
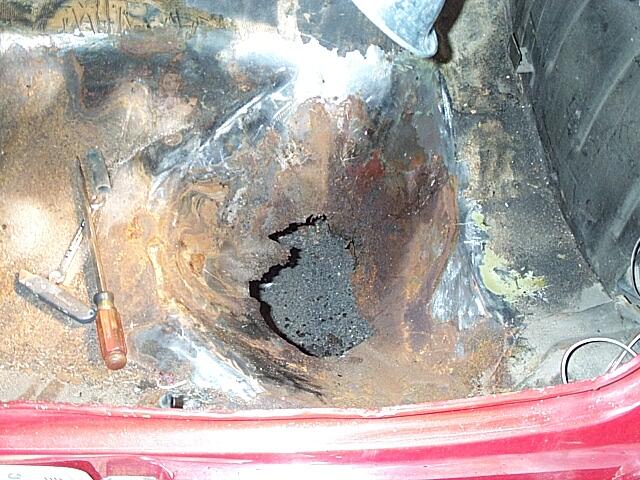
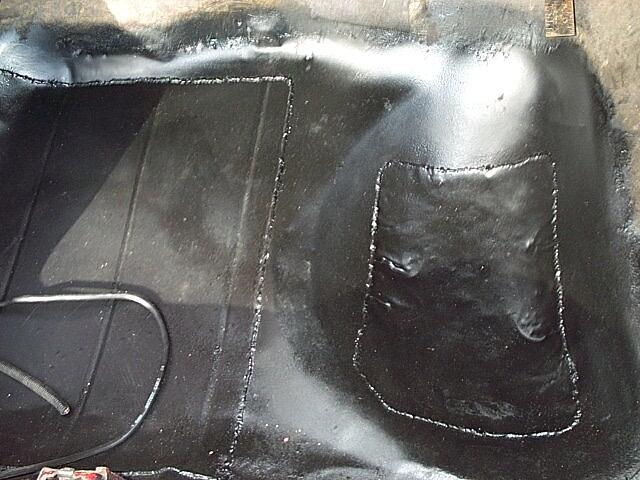
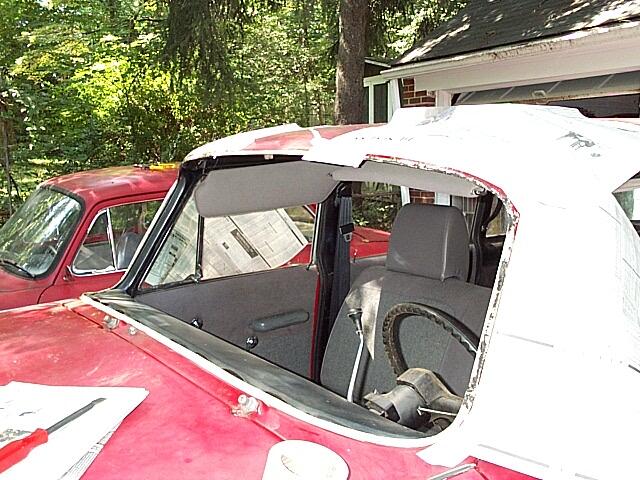
One of the major problems with the car was rust in the floorboards. The windshield seal had been leaking rainwater onto the front carpets for years, causing some major cancer. One of the previous owners had attempted to repair the floor with fiberglass, but since the leak was never fixed, the rust spread out beyond the original repair.
My repair solution was to cut out any rusty metal, and MIG-welded in new panels. The metal stock for the replacement panels was supplied by The Eastwood Company. I used the thickest metal they sold - 18 gauge, zinc coated in 23"x36" sheets.
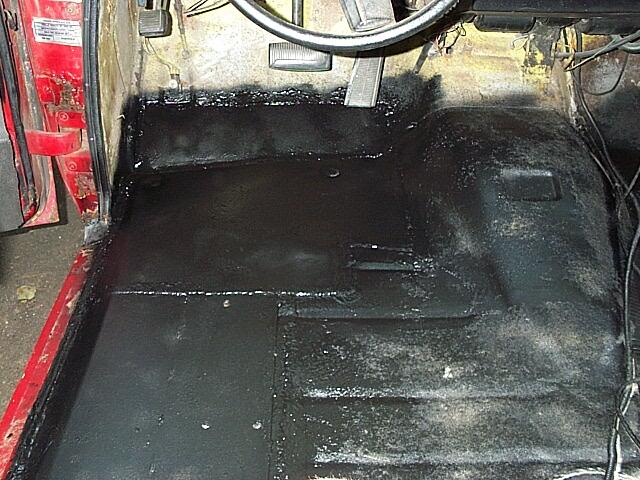
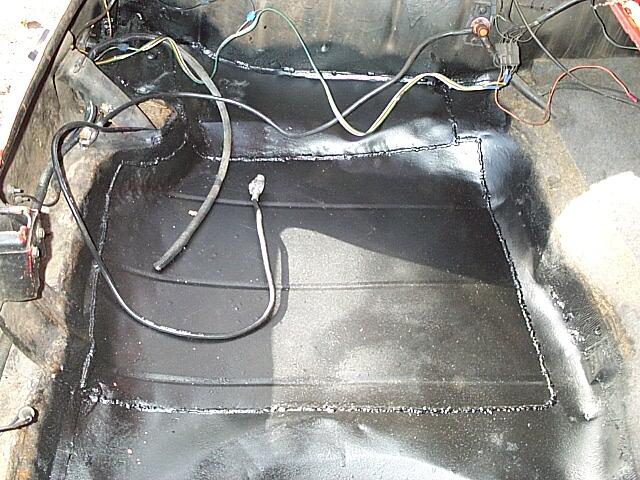
Once the new panels were installed and fitted, liberal amounts of undercoating were sprayed on both the interior and exterior to help seal and protect the repair. Click on the links to the left to see the repair process!
Main Floor Section
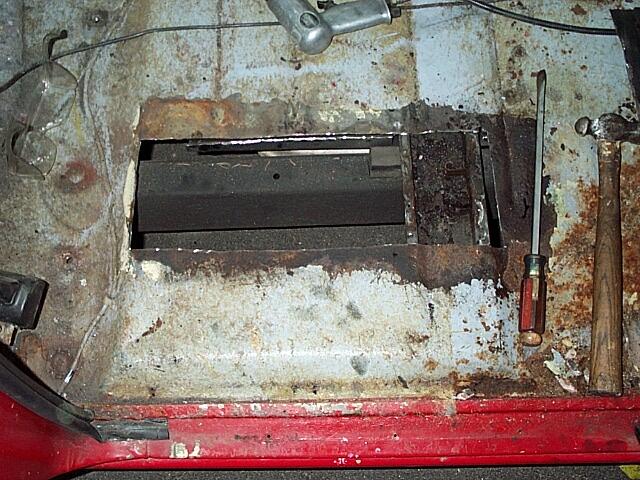
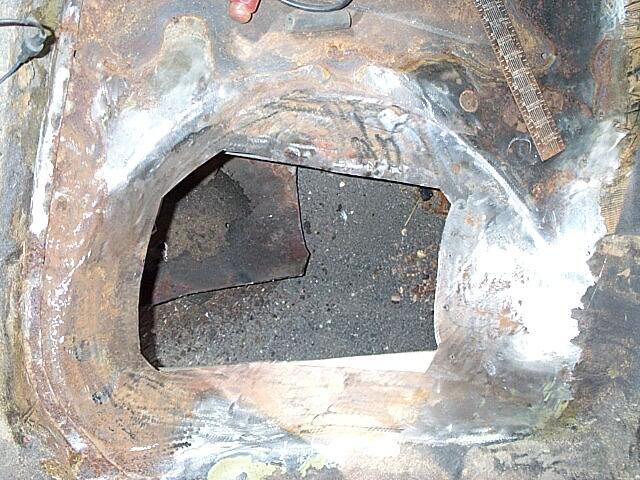
The trunk was in even worse shape than the passenger compartment floorboards. The rear windshield seal also leaked pretty badly. Add a leaky battery into the mix, and you have a wonderfully corrosive solution eating away at the steel. I had to replace one large section of the floor and part of the spare tire well.
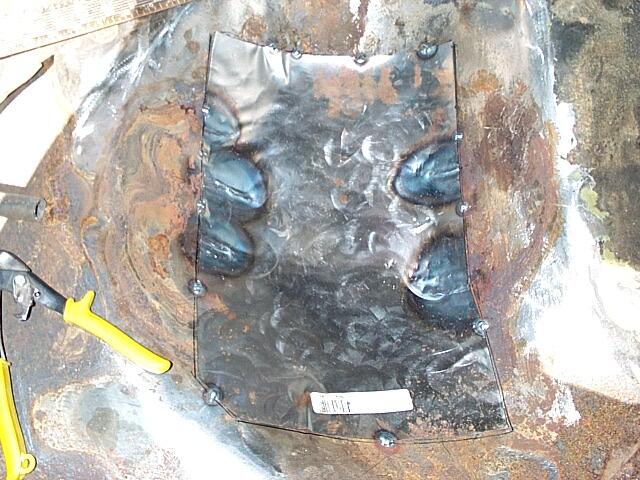
The main section of the trunk floor that had rusted out was so large, a single 23"x36" panel wasn't even large enought to fill it! I ended up sectioning 2 panels together to replace this area. I did get to purchase a new toy for this project - A "bead roller". The purpose of a bead roller is to form ridges in the sheet of steel to make it stiffer. The beads I rolled into the replacement panel are of the same size and in the same location as the original panel.
For the rusted out spare tire well, I used thinner 20 gauge sheet metal. This was due to the fact that I had to shape compound curves in order for the new panel to fit properly. By heating the metal with a Mapp ® gas (propane/oxygen blend) and beating it with hammers and mallets, I was able to get a patch that came very close to the original contour. Once again, the pictures to the left tell the story.
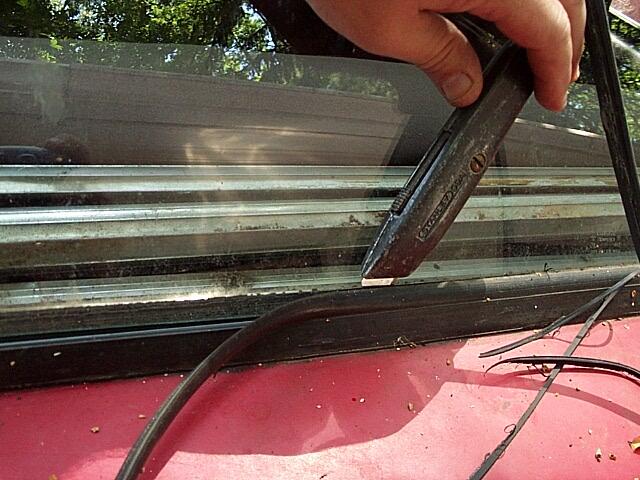
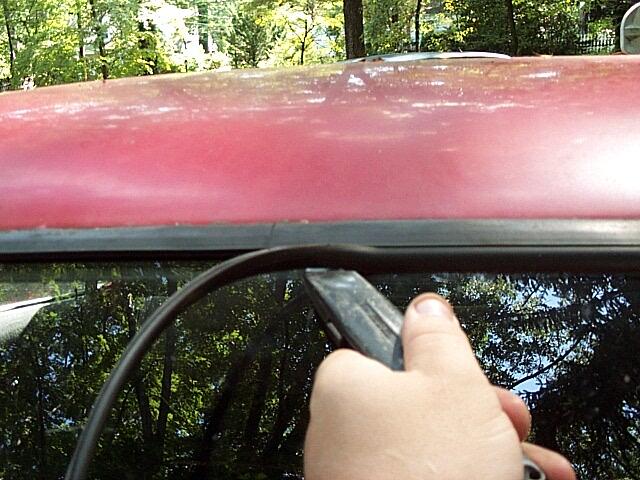
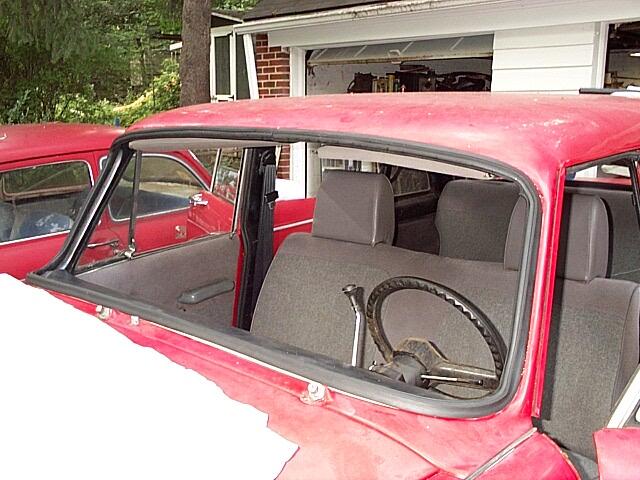
After all that work repairing the rust in the floors, I would have to be stupid not to replace the window seals! The process isn't to hard at all. First, use a utility knife to trim off the "lock strip" formed into the rubber seal. This will allow the glass to be removed with almost no force. Considering how expensive and rare Checker glass is, it pays to be cautious!
Mo's Checker had some rust underneath the seal, so I sanded it out and applied rust converter. After the rust coverter came some primer and finally Rustoleum red paint. After allowing the paint to dry, I was ready to proceed. The next step is to glue the seal onto the body. IMHO, the seal is poorly designed and prone to leak. To help prevent future leaks, use *plenty* of black silicone or weatherstrip adhesive when gluing in the seal. Once the seal is in place, place the windshield on top. Press gently but firmly to seat the glass in the seal, and engage the locking strip. I didn't use enough sealant, as a small amount of water still leaks when it rains. I guess I'll get the honor of replacing the seals again next year. :(
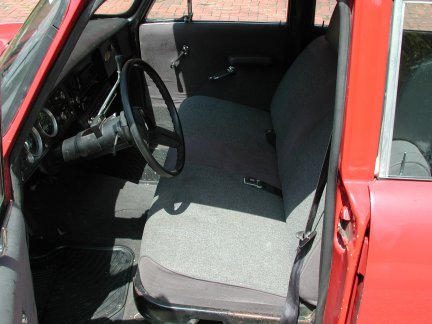
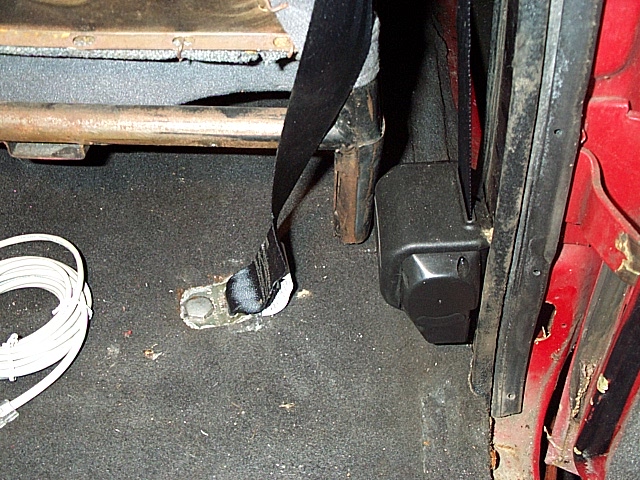
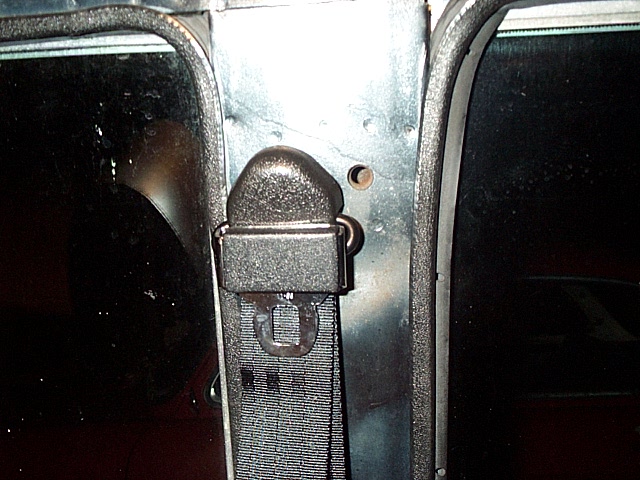
Another item that failed the safety inspection was the condition of the front seat belts. Actually, the belts were fine, but the retactors often jammed no matter how slowly I would try to pull out the belts. And once I had enough belt pulled out to buckle myself in, the automatic tensioners would not pull back in the slack. Not good at all!
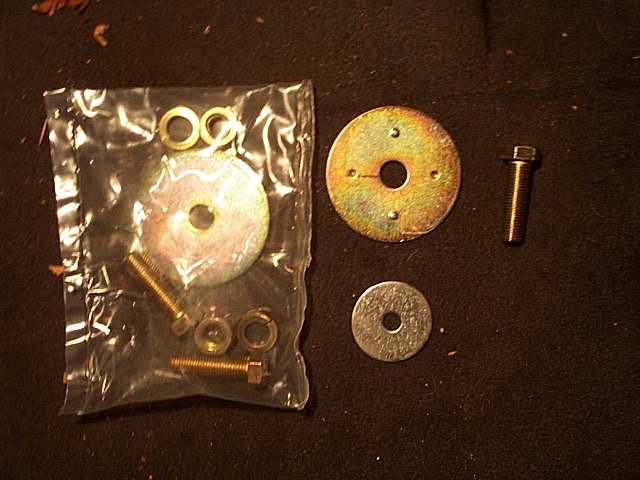
Checkers have a strange seat belt system, with 2 retractors. One is mounted down low on the floor, and the other is up high near the shoulder. I couldn't find a company that sold new belts in that configuration, so I ordered generic seat belts from JC Whitney.
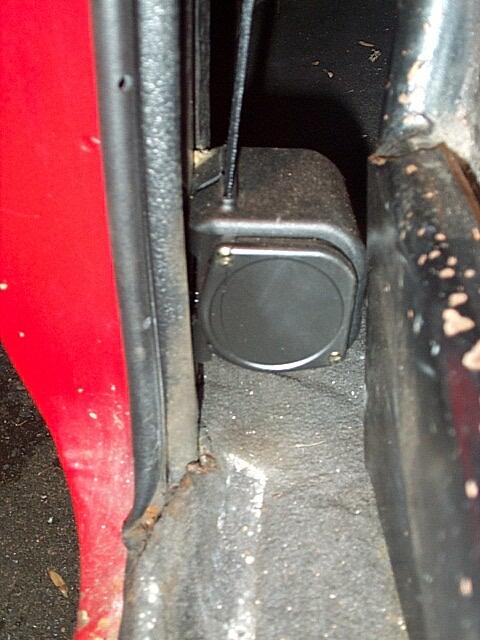
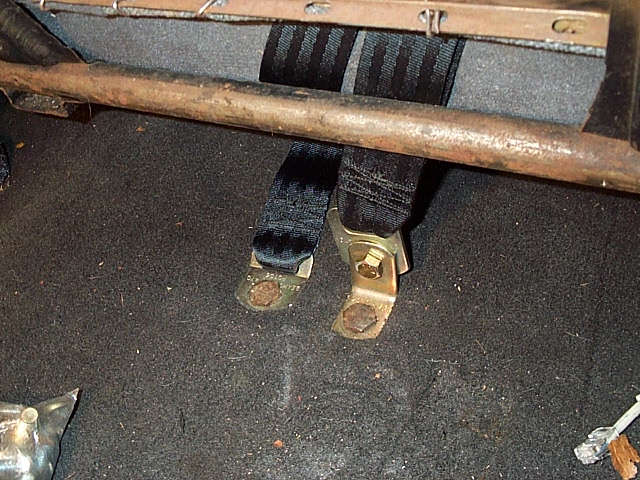
These new seatbelts use a single, floor mounted retractor and a guide where the upper retractor would normally reside. Once I had the new seatbelts in my possession, I poked, prodded and inspected the car for good mounting points. Mounting the guide was a no brainer- It simply screwed right into the same spot the factory upper retractor did. There was even an additional threaded bolt hole right next to it for me to use. The tricky part was the floor mounted retractor. The factory retractor was made to bolt to a frame member in the floor. The JC Whitney model wasn't - At least not without some custom made brackets.
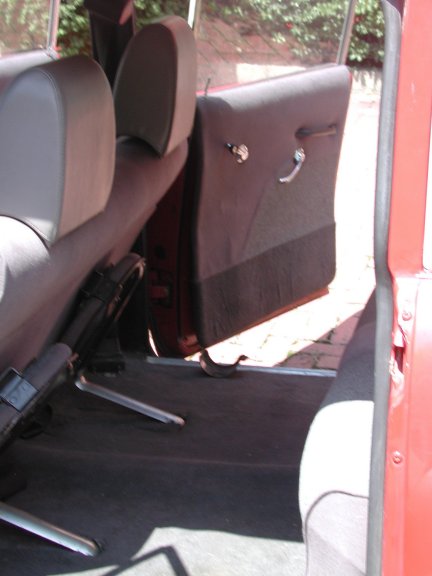
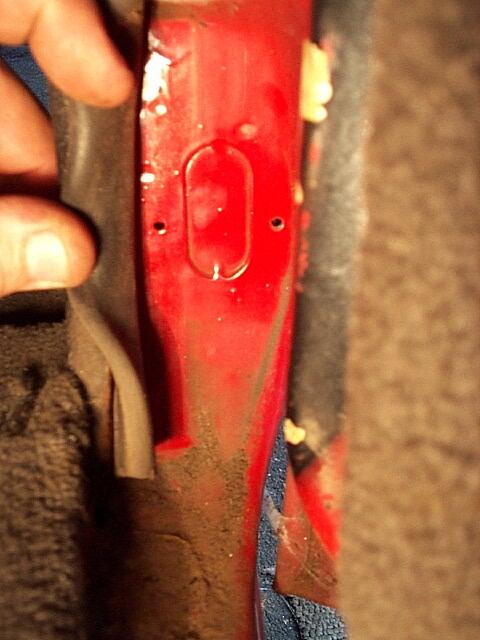
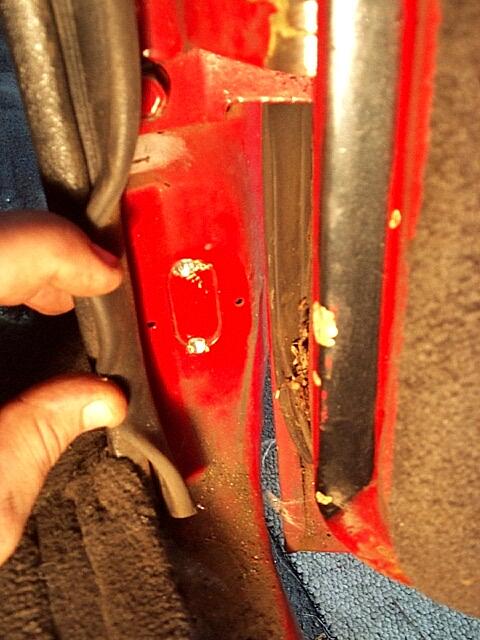
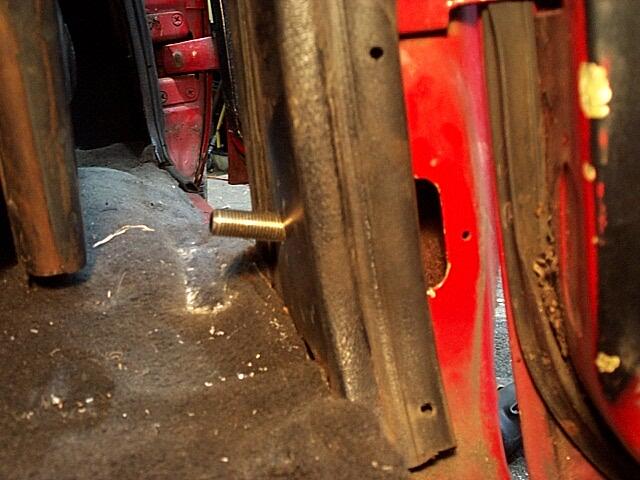
Looking closely at the back of the "B" pillar (The pillars are the vertical sections of steel that run up to the roof. They are labeled alphabetically from front to back. Four-door cars typically have an A, B and C pillar. The "A" pillar is the metal at the edge of the windshield, the "B" pillar is between the front and rear doors, and the "C" pillar is just before the rear glass. Of course, Checker Aerobusses also have the "D", "E" and "F" pillars!) from the passenger area, I noticed a stamped-out shape. Closer inspection revealed that they were some sort of access hole, with filler plates tack-welded in to seal them. I used a 3/16" drill bit to weaken the welds, and I was able to tap the fillers out. This gave me access to the inside of the pillar!
I then drilled a 3/8" hole in the side of the pillar, and managed to snake a mounting bolt with a thick fender washer inside the "B" pillar (The huge reinforcing washer that came with the belts had no chance of fitting through the access hole). With that done, it was a simple matter to bolt the retractor in place. The other end of the seat belt is bolted to the floor with the hardware that used to hold the old retractor. I haven't reinstalled the access panel covers yet, since the only time you can see them is with the back door open.
One last issue with the JC Whitney seatlbelts - The short, fixed length end of the belt is just barely long enough to reach up onto the front seat when you have the seat all the back. If you scoot the bench seat forward even one "click", the clasp disappears into the cushion. A longer fixed-length belt or some simple extender plates are needed if you like the seat further forward.
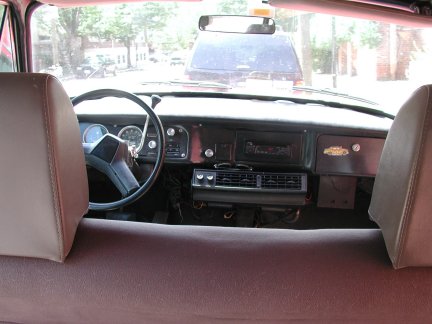
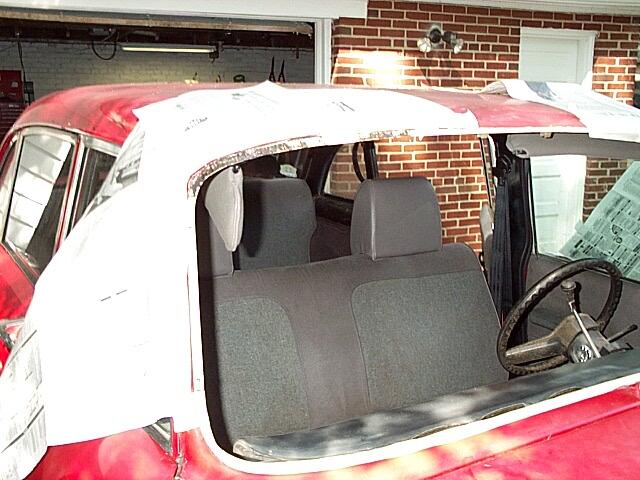
I have plenty more to add to this site in the future, so be sure to stop back. For now, here are some assorted pictures.
Send TomC some mail!